Hey folks, if you’ve ever worked on a car’s suspension, you know how intimidating installing a control arm can be. One wrong move and you’re stuck with uneven tire wear, weird vibration at highway speeds, or even worse—risky handling that makes driving feel sketchy. As a control arm supplier, I’ve talked to dozens of gearheads and techs who messed up installs because they skipped a step or grabbed the wrong tool. Today, I’m breaking down exactly how to get it right, no shortcuts, no guesswork. Control Arm
First off, let’s talk basics for anyone who’s new: control arms are those metal arms that connect your suspension to the chassis, right? They keep your wheels aligned, transfer steering force, and absorb all the bumps from the road. If yours are worn out (loose bushings, bent from a pothole), replacing them is non-negotiable. But here’s the thing—most people think “unscrew the old one, bolt the new one in” is all there is to it. Nope, that’s half the battle. The other half is prep work that saves you hours later.
Let’s start with what you’ll need before you even jack the car up. Skip the dollar-store socket set—you’re working on suspension, so you need solid tools. First, a floor jack and jack stands (never just a jack, I’ve seen too many cars shift on a jack mid-install). Then, a breaker bar for those stubborn old bolts—rusty control arm bolts are a pain, and a regular ratchet won’t cut it. You’ll also need a torque wrench, and yes, it has to be accurate. A mis-torqued bolt can work loose over time, and we don’t want that. Throw in some penetrating oil (like PB Blaster) for the old bolts, maybe some wire brushes to clean up the mounting points, and a can of white lithium grease for the new control arm’s bushings later. Oh, and get the right part! As a supplier, I can’t stress this enough—check your OEM part number, not just the make and model of your car. Some trim levels have different control arms, and buying the wrong one means you’re doing this whole thing again next month.
Now, step one: prep the car safely. Park on a flat, level surface, pop the hood, disconnect the negative battery cable (it’s just a safety thing, in case your wrench slips and touches the frame). Jack the car up at the correct jack points—check your owner’s manual, because jacking the wrong spot can bend the frame or even slip. Set it on jack stands, under the chassis’s pinch welds or designated lift points, not the fuel tank or exhaust. Then, remove the wheel on the side you’re working on. If you’re doing both sides, do one at a time—don’t take both old control arms off before the new one is on, so you have a reference point for alignment.
Next, tackle the old control arm. Spray penetrating oil all over the bolts (the inner chassis bolt and the outer wheel knuckle bolt) and let it sit for at least 15 minutes—don’t skip this, I’ve watched guys snap bolts because they tried to muscle it right away. Once the oil’s had time to work, use the breaker bar to loosen the bolts. Here’s a pro tip: if the inner bolt is stuck, have an extra set of hands hold the control arm steady while you loosen it, so it doesn’t twist the chassis or your wrench. Once both bolts are loose, you can usually wiggle the old control arm off. If the bushings are totally shot, it might just fall apart in your hands. Take a second to inspect the mounting points on the chassis and wheel knuckle—if there’s rust or gunk, use the wire brush to clean those spots. A clean surface means a tighter, more secure fit for the new arm.
Now, the part that makes most people mess up: aligning and installing the new control arm. First, set the new control arm in place. For most rear-wheel-drive cars, the outer bolt connects to the wheel knuckle, and the inner bolt connects to the chassis. Here’s the trick: don’t tighten any bolts all the way yet. You want the bolts to be finger-tight first, because suspension components need room to move a little while the car is on the ground. Wait, why? Because when the car is sitting, the suspension is under its normal weight load. If you tighten the bolts when the car is jacked up (suspension is unloaded), the arm will be misaligned, and that causes uneven tire wear or steering pull. I’ve had customers come back to me with control arms we sold them saying they’re “defective,” and half the time it’s because they torqued the bolts wrong. So for now, just get the bolts started, not tight at all.
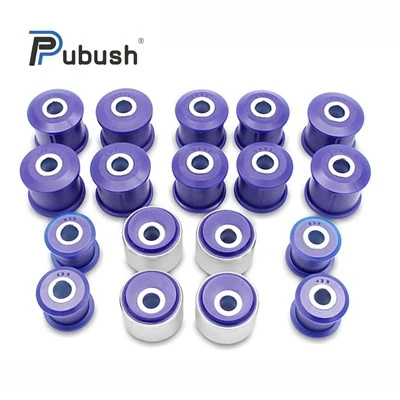
Wait, let’s circle back to the bushings. Most aftermarket control arms (the good ones, not the cheap no-name ones) come with rubber or polyurethane bushings. If you’re going rubber, skip the grease—rubber doesn’t play well with grease, it makes it break down faster. If it’s polyurethane, a little white lithium grease on the bushing sleeves will make it easier to slide into place. Trust me, I’ve seen guys install a polyurethane arm without grease and spend 20 minutes fighting to get the inner bolt through. That’s a tiny step that saves so much time.
Once the new control arm is loosely mounted, put the wheel back on, lower the car all the way to the ground, and let it settle for a minute. Give the wheel a little bounce to make sure the suspension is sitting normally—no weird tilting, nothing. Now, this is when you torque the bolts to spec. What’s to spec? Check your service manual, or if you got the control arm from us, our product sheets have the exact torque numbers. For example, most inner chassis bolts are around 70-85 ft-lbs, and outer knuckle bolts are around 90-100 ft-lbs. Don’t guess here—torqueing too tight can crack the bushing, too loose and the bolt will work loose. And make sure you torque them in the right order: usually inner bolt first, then outer, following any sequence if the manual says so.
Now, post-install checks. You don’t want to finish and drive off only to notice something’s off. First, grab the wheel and shake it hard—no play, right? If there’s any wiggle, you didn’t torque the bolts enough, so go back and tighten them a little more. Then, take the car for a test drive on a residential street first, not the highway. Notice if there’s steering pull to one side, or vibration at low speeds. If everything feels normal, take it to a shop for an alignment within a week. Wait, why? Even if you did everything right, unbolting and bolting the control arm can throw your alignment off a tiny bit. A $50 alignment is way cheaper than new tires from uneven wear, so don’t skip that.
Now, let’s talk common mistakes I see as a supplier. First, using cheap tools. A $10 socket can round off a bolt head, and then you’re stuck with a broken bolt that you have to drill out—costs you time and money. Second, working on both sides at once. I can’t tell you how many times a customer brought in a car where both old control arms were off, and they didn’t have a reference for the angle, so the new arms were installed wrong. Third, rushing the penetrating oil. If you skip that, you’re risking snapped bolts, which are a nightmare to remove. And fourth, skipping the alignment. So many guys think “I eyeballed it, it’s fine” and end up with a 20% wear on one tire in three months. That’s not saving money, that’s wasting it.
Wait, a quick note on aftermarket vs OEM control arms. Some guys ask if they can get a cheap no-name control arm online, and I always say—you get what you pay for. A cheap arm might have thin metal that bends easy, or bushings that tear in a year. As a supplier, we make control arms that meet OEM specs, so you know the fit is right, the metal is durable, and the bushings last. If you’re doing this install right, investing in a quality control arm is just part of the process.
Now, if you’re not comfortable doing this yourself—no shame, not everyone is a gearhead. Most auto shops can do a control arm install in a couple hours, just make sure they’re using the right tools and torquing the bolts correctly. Don’t let them cut corners, like tightening the bolts when the car is still on jacks.

At the end of the day, installing a control arm isn’t rocket science, but it’s the kind of job where a small mistake leads to big problems. If you’re gearing up for this, make sure you have the right parts, the right tools, and take your time. If you need a reliable control arm for your vehicle, feel free to reach out to us to discuss your exact needs and get all the details you need for a perfect install.
Sway Bar Link References:
- Automotive Suspension Technology, Society of Automotive Engineers, 2021.
- Chassis Service and Repair Manual, National Institute for Automotive Service Excellence (ASE), 2022.
- Control Arm Installation Best Practices, Aftermarket Auto Parts Alliance, 2023.
Xingtai Refined Machinery and Auto Accessory Co., Ltd.
Xingtai Refined Machinery and Auto Accessory Co., Ltd. is one of the most professional control arm manufacturers and suppliers in China, featured by quality products and low price. Please rest assured to wholesale durable control arm made in China here from our factory. Customized orders are welcome.
Address: XINGTAI REFINED MACHINERY AND AUTO ACCESSORY CO., LTD507 NORTH TAIHANG ROAD, XINGTAI CITY, HEBEI PROVINCE, PR.
E-mail: lindy@rfauto.biz
WebSite: https://www.pubush-suspension.com/
